
In Loans, one loan can finance several assets, such as a fleet of vehicles on one facility. The loan keeps its own record, and each asset carries its share of the amount financed. This article covers putting several assets on one loan, changing how the loan is split between them, and what to do when one asset is sold and its share of the loan is paid out. To check whether your register has Loans, see Am I in the new Loans feature?
Linking more than one asset to a loan is currently available on the Premium plan.
Put several assets on one loan
You can link the assets when you add the loan, see How to add a loan. When you import loans from a file, each loan is linked to one asset, and you add the others here, see Add your assets, then import your loans. To add assets to an existing loan:
- Open the loan and select the Assets tab.
- Select Add Existing Assets, tick the assets and select Next.
- Enter the amount financed for each asset. Unallocated shows how much of the loan is not yet assigned to an asset.
- Select Save.
Each asset shows the loan it belongs to on its own Loan tab.
Change how the loan is split
On the loan's Assets tab, select Edit Allocations, change the amounts and select Save.
Changes to the assets on a loan take effect from the loan's commencement date, or from its most recent refinance date if it has been refinanced. The Effective Date at the top of the panel shows which date applies. To make a change from a different date, refinance the loan on that date first.
When an asset is sold and its share is paid out
If one asset on the loan is sold or written off and the lender is paid its share, the loan carries on for the other assets. Record it in this order.
1. Refinance the loan on the payout date
- Open the loan, select Actions, then Refinance.
- Enter the Refinance Date. The panel shows the outstanding principal and interest at that date.
- Enter the new amount and the payment schedule your lender has given you, then select Generate Schedule.
- Check the schedule and select Refinance.
If the refinance date is also a payment date, the new schedule replaces the existing payment on that date, and the panel tells you so. Check that the first payment is right.
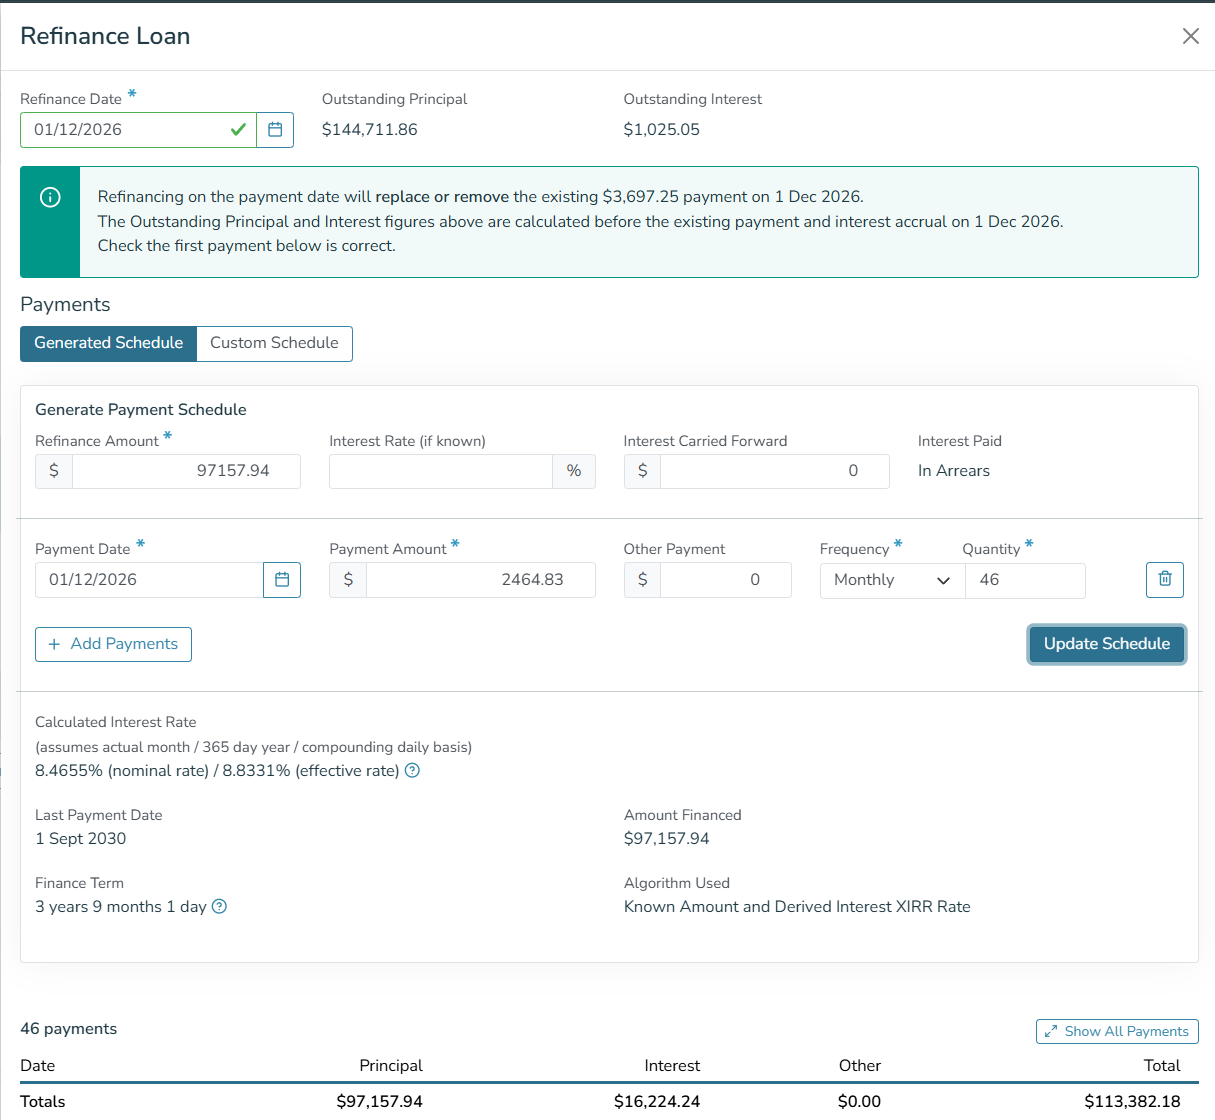 Loans (new) - refinancing a loan after a partial payout.
Everything before the refinance date stays as it was. The loan's Timeline shows the refinance as a new version, and you can still view the earlier one.
2. Remove the asset from the loan
On the loan's Assets tab, select Remove next to the asset and confirm. The asset is removed from the date of the refinance you have just recorded. If you need to remove it from an earlier date, reverse the refinance first.
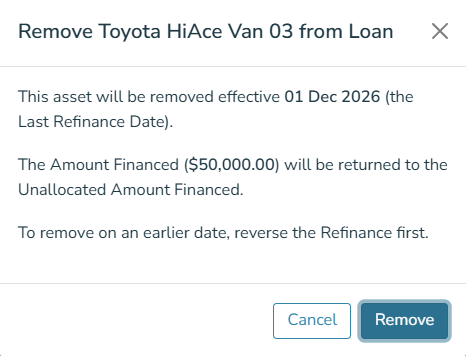 Loans (new) - removing an asset from the date of the refinance.
The asset stays in the list, marked Removed, with the date it was removed.
3. Split the loan between the remaining assets
The amounts on the remaining assets do not change by themselves. Select Edit Allocations and enter the new amount for each asset until Unallocated shows $0.00, then select Save.
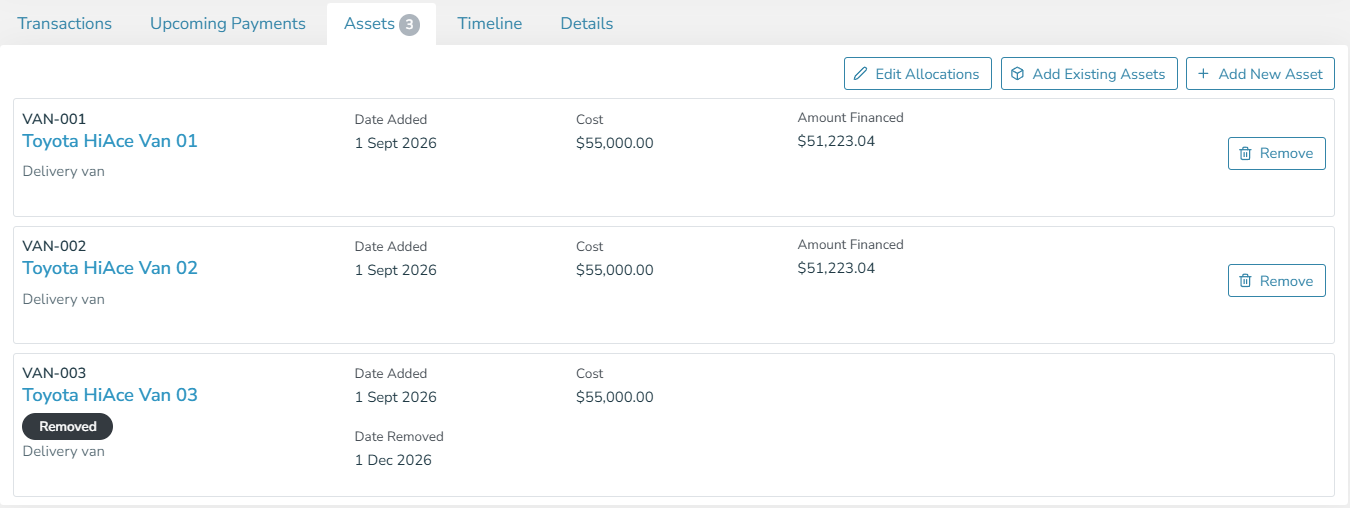 Loans (new) - the loan's assets after the payout.
4. Dispose of the asset
Record the sale or write-off of the asset as you would for any other asset.
Loans is new and we are still adding to it. Bulk actions for loans are not available yet. See What is coming next in Loans.