
Which version are you in?
Look at the menu on the left. If you see Loans with a New label, follow the first set of steps. If your leases sit inside your assets, follow the second set.
In Loans (new)
In Loans, you do not need a master lease. One loan can cover several assets, with the amount financed split between them on one page, and an asset can be taken off the loan when it is sold. Linking more than one asset to a loan is currently available on the Premium plan. See One loan for several assets.
Loans is new and we are still adding to it. Bulk actions for loans are not available yet. See What is coming next in Loans.
In the current version
AssetAccountant allows the management of leases which cover multiple assets, in particular using the following features:
- Creation of a "Master Lease"
- Allocation of assets to a Master Lease
- Splitting the total amount financed across these assets
- Reduction of the remaining lease balances in the event of a partial pay-out
This article covers Step 1.
1. Creation of a Master Lease
In order to be able to add assets to a Master Lease, you will first need to create the Master Lease which you can do as follows:
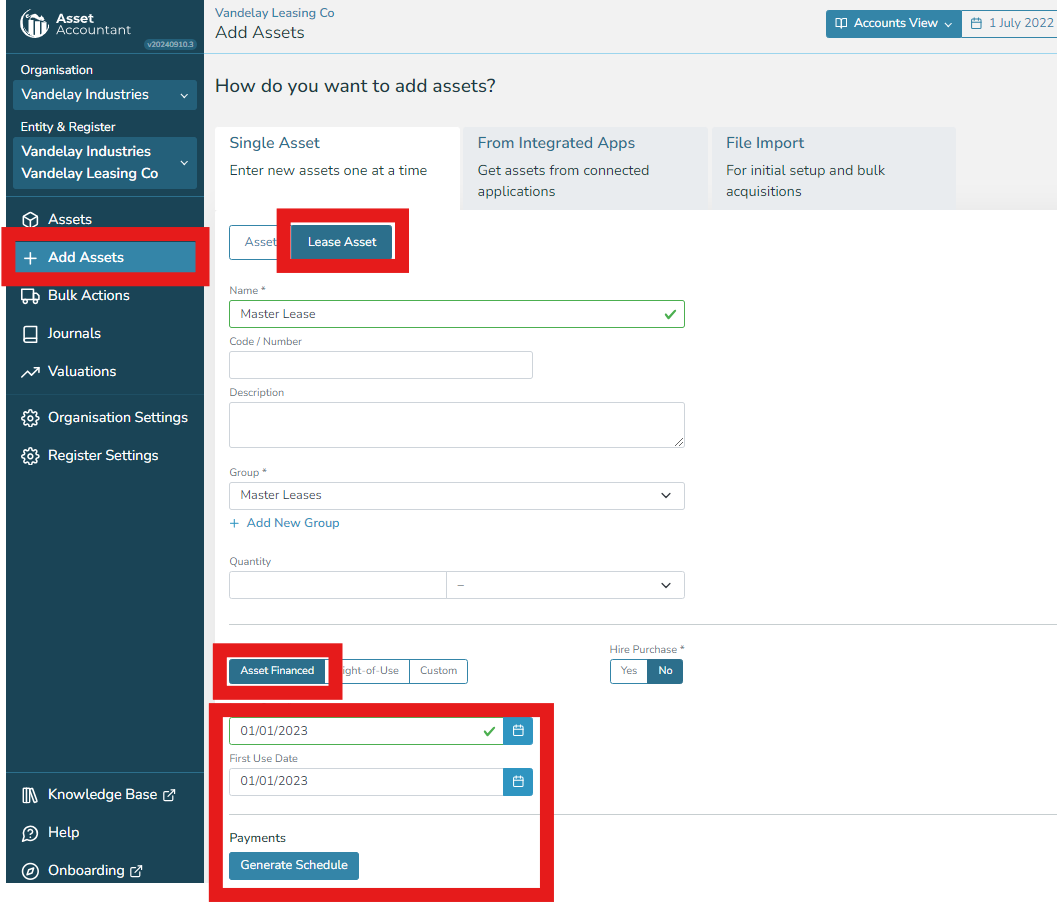
- For the first step, navigate to the +Add Assets menu item on the left hand side and choose Lease Asset
- Select Asset Finance
- Enter the lease start date and then click "Generate Schedule"
This will bring up the side screen where you can enter the lease payment details:
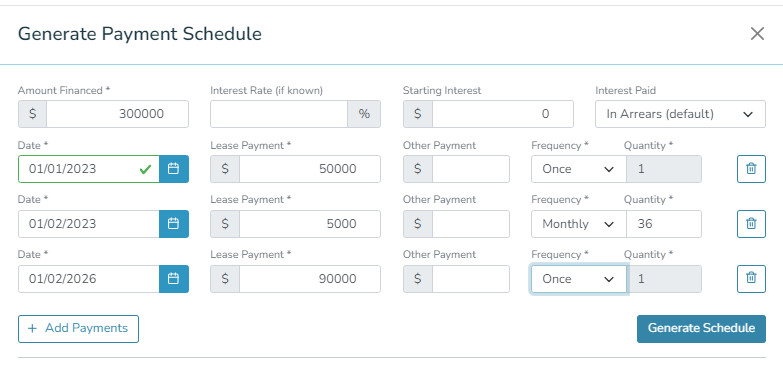
Once you have done this, press Generate Schedule. On the next screen you can review the payments and then select Use Schedule.
This will take you back to the main asset/lease screen. Scroll to the bottom of that screen and take the following steps:
- Enter the lease end date
- Ensure that that "Amount Capitalised" is zero (highlighted below)
- Choose Doesn't exist for Tax Depreciation and Not Capitalised for Accounts Depreciation
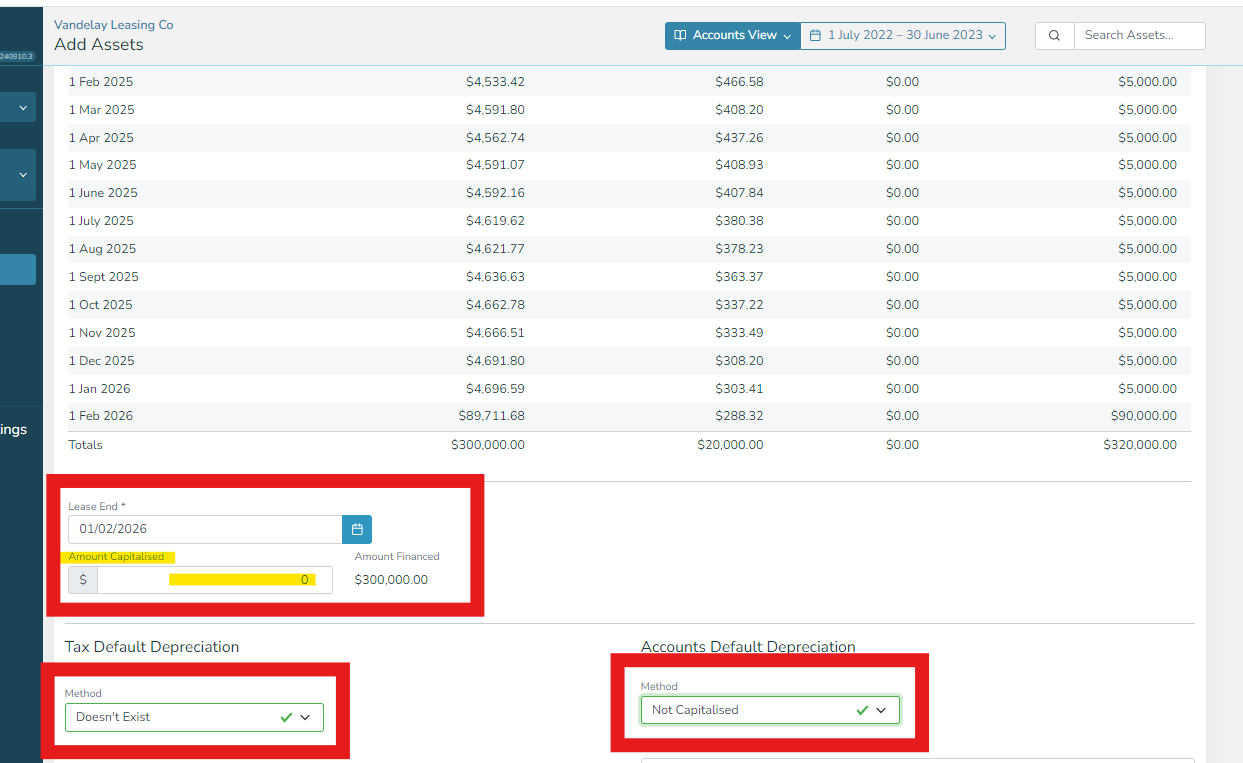
Then press save and your Master Lease is set up.